Tuesday, October 26, 2010

Progress 10/26

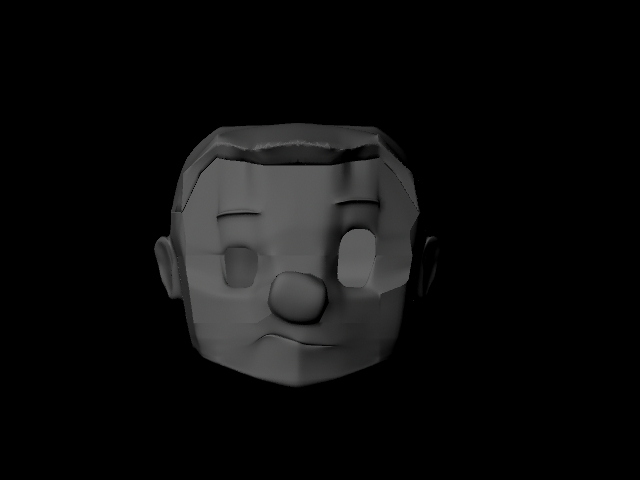
This week, and in the last month generally, I worked on finishing up the Maya models of my heads, so they are ready to print on the 3D printer. As I do more and more modeling in Maya I find it gets faster and easier, although the models are still not quite as I imagined them, they are definitely serviceable and look fairly close to my ideal. Coming to terms with the fact that I cannot control everything and have it turn out perfectly has probably been the most difficult thing this past week, as I cut my animatic down significantly. I realized that at some point I have to accept that I can't produce everything to the perfect levels of a real animation studio that employs several thousand people and takes many years to finish a film, but I can do my best and set myself up to succeed in what I can accomplish, rather than setting myself up for failure by being overambitious and having more shots and characters than time allows.

The most enjoyable thing this week was probably feeling like I'm getting a grasp on the 3D printing process; I find I'm getting a lot less unexplainable annoying errors when I go to print, and the errors that do pop up I now know more or less how to deal with them, rather than it being a huge frustration and waste of time, like it was a few weeks ago.
 Some of my Maya head models, ready to print


Some tips if any aspiring stop-mo animators want to use the 3D printing process through z-print: obviously, you need to close up any holes in your geometry, but it is equally important to check every so often as you model to make sure that all the face normals are pointing outward. Especially check the normals before you smooth, because changing them after is a lot harder. Also, I found that running (Mesh): cleanup, with the settings checked to cleanup only polygons with more than 4 sides, can be a big help if you do it just before exporting out of Maya as an .obj file. This saves heartache later when you can't figure out why the Z-print preview has mysteriously dropped a lot of random faces on your model, leaving ugly holes instead.

Tuesday, October 19, 2010

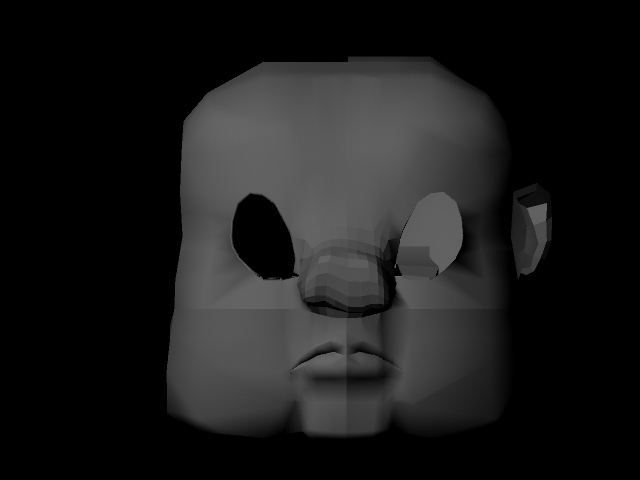
3D printouts

Well, after many problems, troubleshooting, and complete redos, I finally managed to create a model that was compatible with the multiple programs required to print my puppet heads.
The most enjoyable part of the last few weeks was when I finally got a workable model, so I was able to get more creative and adjust it to get different expressions. By Thursday I should have some of the actual expression heads printed out; right now I only have the basic head (3 parts) in two different sizes. I've decided to go with the larger size for the rest of my models.


The most difficult part was, obviously, having to remodel so many times. But now I'm good to go, and I'm planning on modeling the other characters' heads shortly. The last picture shows the lineup of the expression heads in Zprint, just before beginning printing

Tuesday, October 12, 2010

head models

Well, after several weeks of problems with Maya modeling, including a broken hard drive, incompatibility between Maya versions, holes in models, and issues with normals, I am now on model #3 of the main character's head, so hopefully THIS one will work out and jive with the 3D printer. I also began modeling the mother's head:


Tuesday, September 21, 2010

Thesis Update

Well, this week I am finishing up my animatic and building the last 2 armatures I'll need. I've also got the basic set materials and I'm beginning to cut them according to the scale blueprints I've drawn.
The most fun thing this week was doing composition/film studies in preparation for my layout/color keys. Once these are done I'll head to the Fabric District to buy yards of fabric in the colors dictated by my color keys, and begin the costuming process.
The most difficult thing was staying up really late every night to try to finish this animatic. It's been taking the majority of my time and I'll be more than happy to get it over with and move on to more fun parts of the process.

Monday, September 13, 2010

Weekly update

   This week I've been focusing on character facial expressions, specifically for my main character. So far I've drawn: Blank, Concentrating, Annoyed, Annoyed and Disgusted, surprised, nonplussed, confused, unsure, discovering a pastry, ambiguously skeptical, rolling eyes, embarrassed, mouth full, eating, scared and disgusted, scared, more scared, grossed out, confused, sticking tongue out, ghostly, screaming, etc.
I drew them all on paper from the front view, some also from the side, and a lot I drew in 3/4 view in the actual animatic.

I've also been working a lot more on my 3D model of the boy's head. It's been fun trying to figure out the logistics of translating 2D expressions into 3D models, but it will also be a huge challenge. We'll see how it goes.....................

Monday, September 6, 2010

Week 2 Fall '10 thesis blog

This week I've been working mainly on storyboarding for my animatic, and modeling the boy's head in Maya so it can be printed on the 3D printer.
One thing that was difficult was trying to draw my storyboards in Photoshop without a Wacom driver for the computer. Being in the new animation building is great but it has its drawbacks, as the new computers still need some tweaks and programs to be fully functional. Without the Wacom driver installed, the tablet has no pen pressure setting, which has been hard to work around.
I've tried making some hands out of wire and liquid latex, which has been a lot of fun to experiment with. Some turned out okay and others look like a drippy mess, so more work is needed as I expect to need approximately 3 pairs of hands for each character, and far more for the main character.

As soon as I finish my animatic, I can move on to color keys, which are essential so I can lock in the color palette and buy fabrics to begin costuming the puppets. The head modeling is coming along on schedule.

Monday, August 30, 2010

First post of Fall 2010 semester

     Well, I did get some work on my puppets and set done over the summer, but not as much as I would have liked. The most difficult part of my process has been trying to find the money to buy the supplies I need, and looking for methods of making set pieces that will cheap enough not to strain my budget while still looking good. Pictures of my puppet armatures to come soon.

     Another difficult part of the process this week has been re-working my storyboards and animatic. I've cut out some scenes that seemed either too boring and irrelevant to the story, or too difficult to animate in the time frame I'm working under. Right now I'm redrawing all my boards in photoshop, trying to work adding in more dynamic angles and shots. I've seen enough subpar animated student films where the characters just sit flatly in the middle of the screen to know that is NOT what I want.
     I want to take my film in a more cinematic and hopefully more professional-looking direction, cutting on the action and using interesting closeups and angles, even though with my limited stop motion equipment a lot of camera movement (pans, tracking etc.) won't be an option. To help me conceptualize what a successful film looks like, I've done some film studies of shots from Coraline, Spirited Away, Corpse Bride, and several other movie clips.

     One thing I was happy with this week is how the seats I'm building are turning out. I thought a lot about how to make seats that (a) all look more or less identically mass-produced, (b) are cheap and (c) are strong enough to hold up to about 5-6 months of animating. The best method I could come up with was to use fiberglass cloth with resin, molded to a curved piece of metal bent to the shape the seats will be.
     Using this method I now have 4 more or less identical, fairly smooth double seats, though they still need to be sanded, primed, and painted. It's too soon to know how they will look at the end of the day, but I was happy to find a reasonably economical method that met the seat criteria I had set. The background seats that will not be in heavy use will just be thin aluminum metal, bent to the appropriate shape and primed and painted to look like the fiberglass seats.